Cabinet Door Message Board and Organizer
I’ve got a fun upcycle project to share with you today. I used cabinet doors to make two message centers.
Not only am I sharing a project today, my friends from my favorite Facebook group, Creative Vintage Darlings, are also sharing projects. Creative Vintage Darlings is a group for anyone who loves vintage. If you’d love vintage, you’ll most certainly enjoy this group. Click here to join! We also invite you to follow along on our Creative Darlings Pinterest Board and also with #creativevintagedarlings on Instagram. Be sure to read to the end of this post to find links to all of the projects shared today.
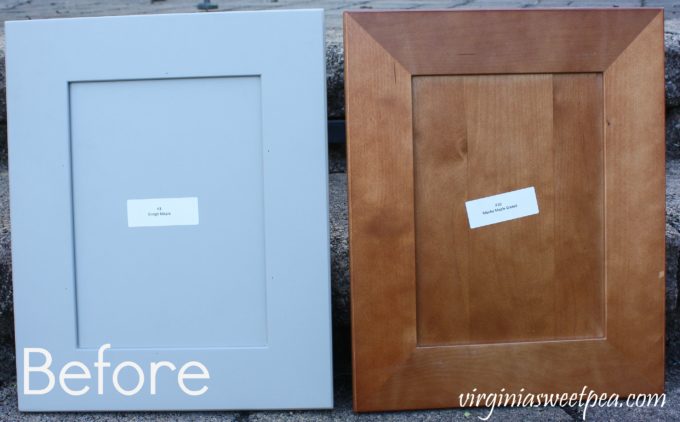
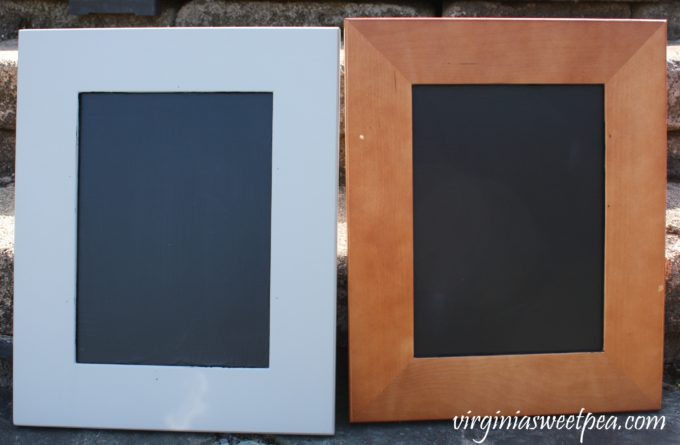
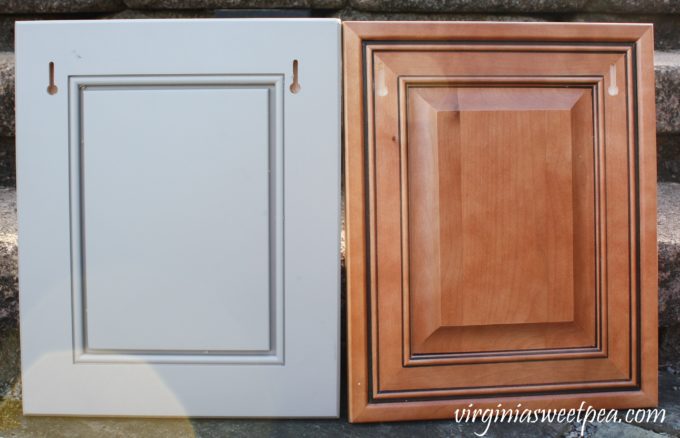
My mom’s friend passed along a stack of cabinet door samples to me a few years ago knowing that I would enjoy using them for an upcycle project. From the stack that he gave me, for this project I selected doors in Greige Maple and a Mocha Maple Glazed. I used the back side of the doors because the shaker style was perfect for this project.
Cabinet Door Message Board and Organizer
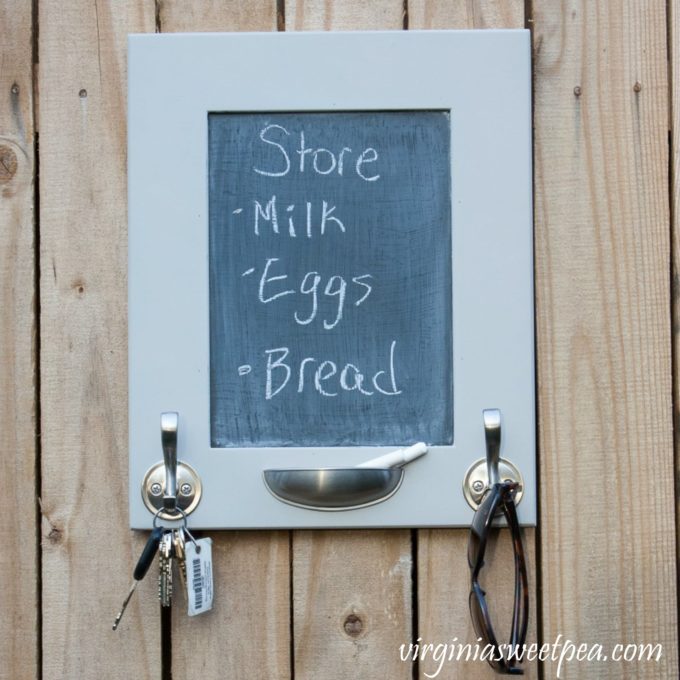
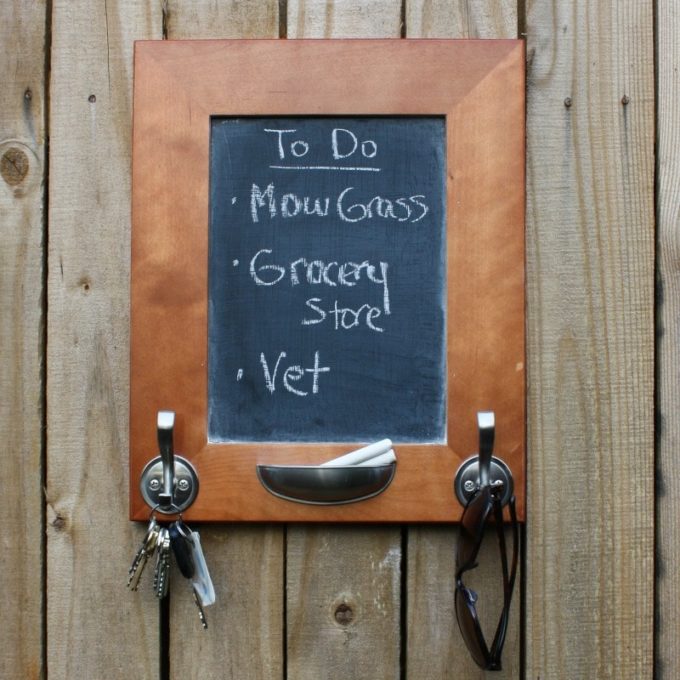
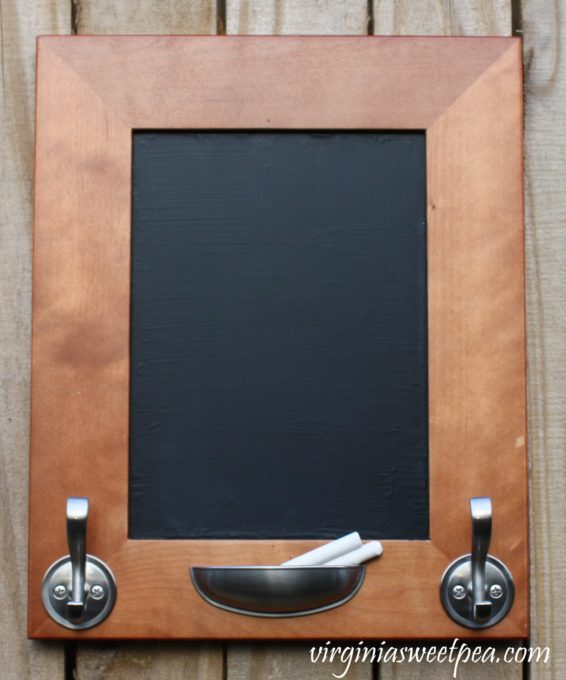
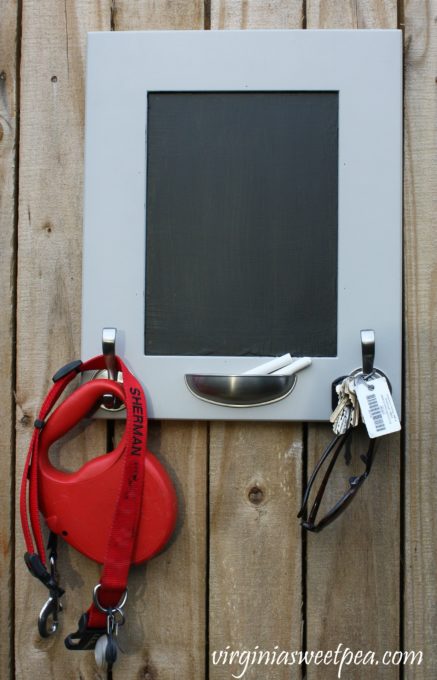
I added a chalkboard, hooks, and a chalk holder to each cabinet door to turn it into a message board and organizer.
Greige Maple
Mocha Maple Glazed
This was a simple DIY that is so useful. My cabinet doors are a small size since they are samples but I think this project would be even better using a full sized cabinet door. Cabinet doors can be found inexpensively at your local Habitat Restore.
How to Make a Cabinet Door Message Board and Organizer
This post contains affiliate links. For full disclosure go here.
Supplies
Cabinet Door
Hooks – I purchased this type at Lowe’s.
Cup Pull – I used a 2 1/2″ center cup pull from Lowe’s.
Painter’s Tape
Router
Drill
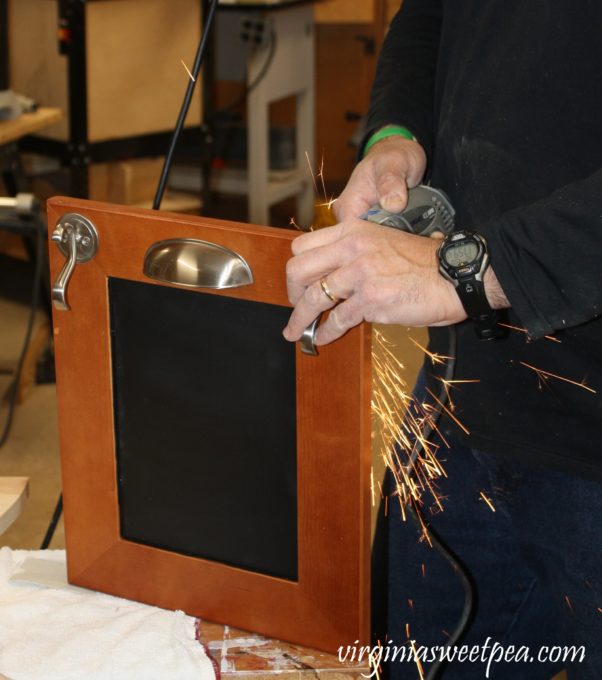
Dremel – To grind off hook screws that were too long.
Step One
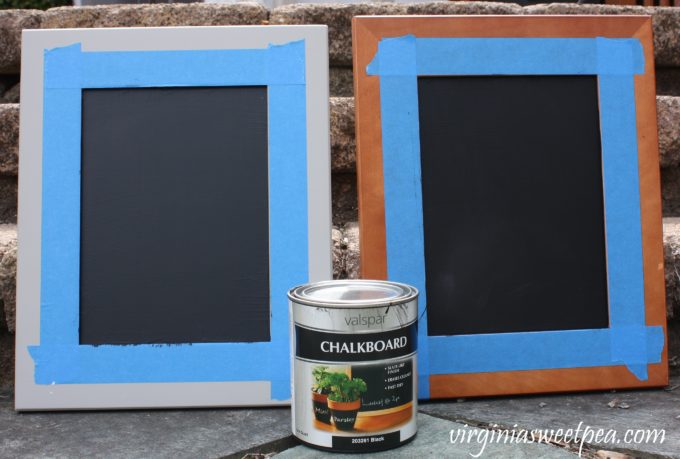
Tape off the cabinet door and paint with chalkboard paint. I used four coats for good coverage.
When I painted the door with the chalkboard paint, I alternated the direction of brush strokes with each coat. I did this to make sure that the door was thoroughly covered with paint.
Step Two
Use a router with a keyhole bit to make keyholes on the back of the doors for hanging. Using keyholes to attach the message board to the wall keeps it firmly in place.
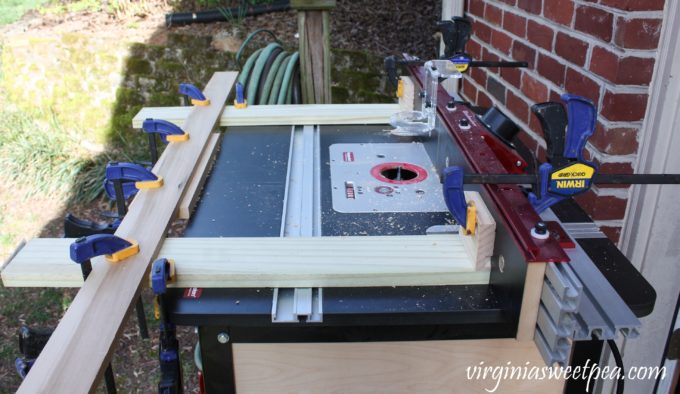
My husband set up a jig on his router table to get the keyholes in the same spot on both doors. I have a stack of these doors and he added keyholes to all of them, so when I use them for future projects, that step will be complete.
Step Three
Add the cup pull to the cabinet door followed by the hooks. The hook screws were too long, so my husband ground them down with a Dremel tool.
Step Four
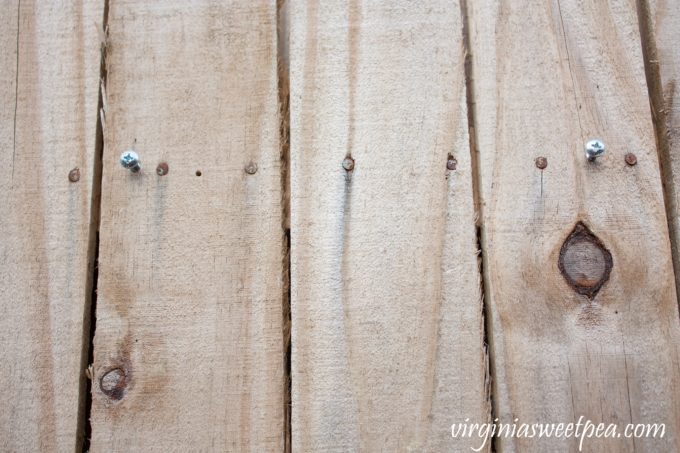
To attach the message board to the wall, measure the distance between the two keyholes on the back of the message board and then screw two screws into the wall where you want the message board to hang. (For demonstration purposes, these screws were inserted into the folding wall that I made to use for selling at vintage markets.
Step Five
Fresh chalkboard paint looks so pretty but the paint must be “seasoned” before you write on the board. If you don’t “season” the paint before you write on the board, the chalk will permanently etch the paint.
Doesn’t this unseasoned paint look pretty?
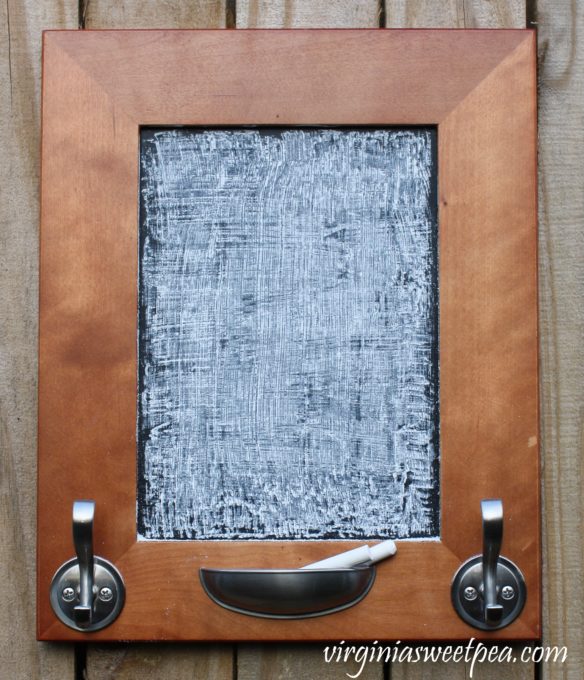
To “season” the paint, rub chalk all over the board in all directions.
Then wipe off the excess chalk with a cloth or chalkboard eraser and your chalkboard is ready to be used.
Enjoy
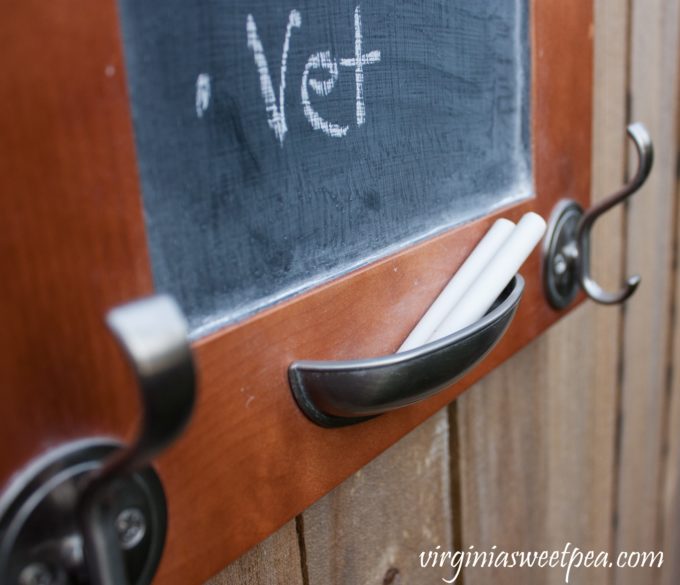
The cup pull makes a perfect spot to keep chalk.
Thanks to hanging the message board with keyholes, the board can be written on without moving around. It also is strong and the hooks can handle holding a good bit of weight.
Check out my Vintage Darlings Friends!
Now please go check out the Creative Vintage Darling’s team and see the very inspiring ways they use their vintage goodies!
Sweet Pea



Paula, the bin pull upside down for the chalk-wow! Why didn’t I think of that? So smart. And those keyholes for hanging your hubs did-over the top! Think he’s a perfectionist like my hubs, I’m thinkin…;)
I love this makeover, Paula…so multi-purpose…and using the drawer pull for chalk is so clever!
I love the idea of the bin pull as the chalk holder. What an A-HA moment!!!
love that you can use the sample doors too that would probably normally be thrown out!
Great job!
Karin
Thank you! I have a whole stack of those doors, now I need to think of other ways to use them.
Paula
I love the upturned hardware for holding the chalk! So smart!
Thank you! It’s going to be great to have a spot to keep a grocery list or to write a quick reminder.
Paula
Clever use of the drawer pull for a chalk holder.
Thank you! My father-in-law says that I should have designed a spot for an eraser. I’m still thinking on that!
Paula
What a fun up-cycle. Great idea, and the hooks and chalk holder are a great addition too!
Thank you! I’m eager to start using this!
Paula
I love message boards and your’s turned out fantastic! Thanks for sharing on To Grandma’s House We Go!
Thank you! I think that I’m going to really enjoy using this.
Paula
I love this idea. It is so handy to have for the quick note and a spot for the keys.
Thank you! It’s nice to have a spot for keys. They are one thing that can easily go missing!
Paula
Loving your message centers, they look awesome. You are god at seasoning, I am terrible at it, don’t do enuf with the chalk first I guess. Next time will try harder. Cupboard doors are wonderful for so many decorative uses.
Lately the habitat in Grand Junction hasn’t had many of them. Hope too many people haven’t learned about using them for art.
We have to go quite a ways to get to our Habitat as is on south east side of GJ and we’re on north west side of Gj on outskirts of another town west. . We don’t get to go to habitat as often as I would like but sure enjoy it when we do, take hours looking around..Happy weekend
It is amazing what can be found at a Habitat store. I don’t go frequently because I always find too much that I want to buy!
Paula
Such a great repurpose, Paula! Thanks for sharing at Vintage Charm–pinning!
Love the chalk boards great idea. Hope you are doing good always glad to see your diy’s.
Thanks for all the little details that make this really work – the keyholes, the jig, etc. When I had two cabinets removed in my kitchen to make room for a new stove I saved the doors, thinking something good could be made. Now I have a great idea.
I love this project! What a great way to upcycle cabinet doors! We have a ReStore nearby and I’m going to go over this week and see if they have any doors.
I’ll bet that they do. I love to poke around the ReStore to see what they have.
Paula
Genius hardware hack, Paula! These are super cute and so helpful!
This is such a great way to repurpose cabinet doors! I love this idea! Thank you bunches for linking up and sharing with us! <3
Thank you, Kristi! It’s fun to think of a use for something that’s likely to wind up in the landfill.
Paula
I love remaking things with cabinet doors but I have never tried a message center. Great idea. Thanks for sharing at #HomeMattersParty
I like to think that a project like this one will keep a cabinet door out of the landfill.
Paula
The pull for holding chalk is genius. These are fabulous and your tutorial is the best. Thanks for linking to Keep In Touch.
Thank you, Katie! It’s nice to think of a way to use something that’s likely to end up in a landfill.
Paula
Hi, Paula!
I was happy to feature your upcycle project at Homestyle Gathering this week! Thanks so much for coming by and sharing at HG!
>>> Kim
Paula, I have several cabinet doors that I removed from an old hutch that I’m now using to display paint in my antique booth. I put them aside thinking I’d find a way to use them, and here it is! Thanks for the great idea! The cup to hold the chalk is so clever too!
Your cabinet doors should work perfectly for this project.
Paula
Hi Paula, This is just what I need out at our cabin. We are meeting new friends and discovering local businesses that we can call on for renovations, so I need a spot to save info. I love the rustic look and this message board will fit right in with the rest of the cabin decor.
Great project. Love how you used a cabinet pull to hold the chalk.
Have a great week,
Kippi
Thank you, Kippi! This is such a handy item to have in the kitchen.
Paula
Love you message boards, Paula. The hardware really give them personality. Pretty and functional, a win/win!
Thank you, Pamela! They have been handy to use.
Paula
What a great idea for an up-cycle!
Thank you! It’s quite useful!
Paula