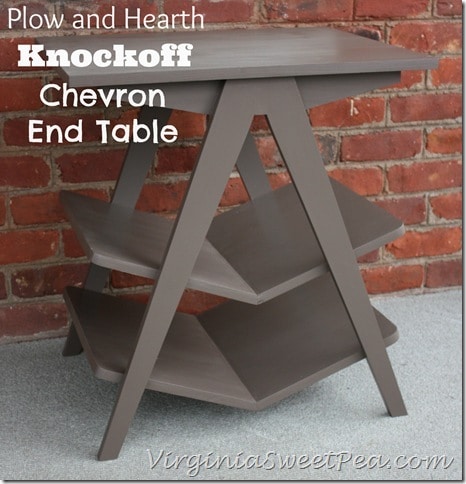
Plow and Hearth Knockoff Chevron End Table
Where to keep magazines is an ongoing problem in my home. I made a side table with magazine storage that keeps my magazines handy and easy to reach. Problem solved!
DIY Side Table with Magazine Storage
Mr. SP and I teamed up to make this side table with magazine storage. It required some math to figure out the angles, a benefit to having a husband who is an engineer. Figuring out how to build this was fun for Mr. SP
Inspiration for This Project
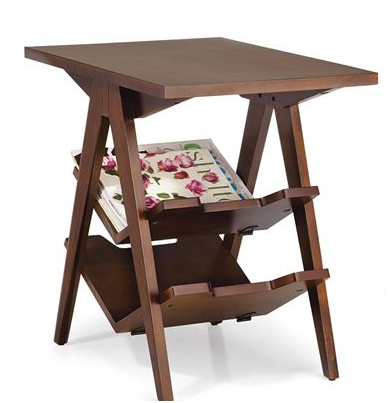
Catalogs are a great inspiration for home décor. Who doesn’t enjoy browsing for ideas and future projects? The moment I saw Plow and Hearth’s Magazine Storage End Table, I knew without a doubt that I wanted to make it.
Isn’t this a neat table? The two shelves under the table are perfect for storing magazines or books. It retails for $199.95 and if I ordered it, with tax and shipping, it would cost $230.54.
My Version of This Table
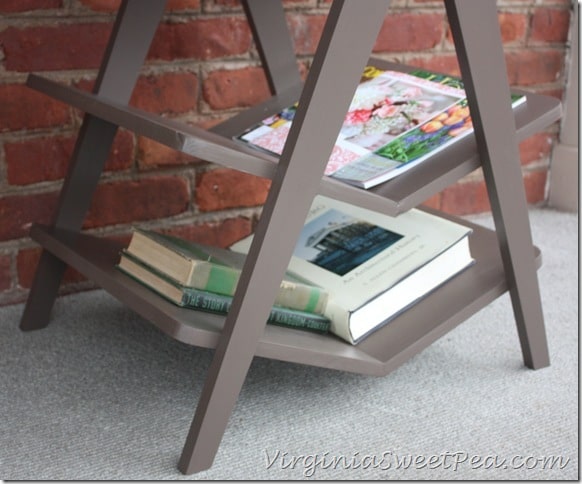
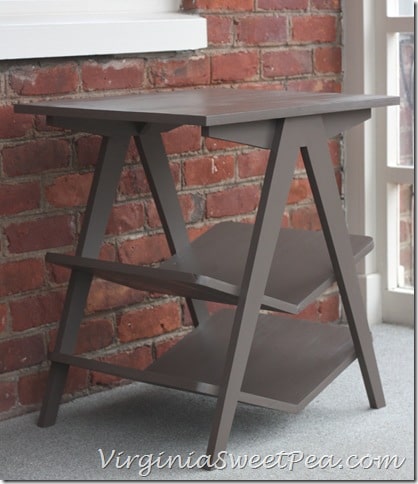
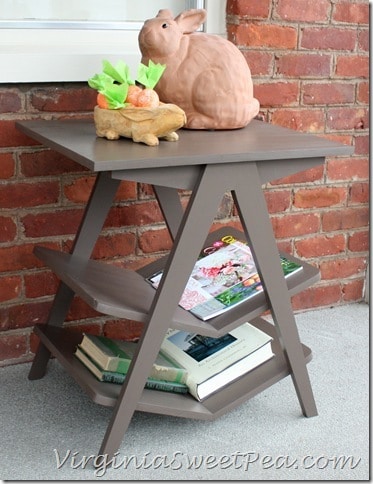
I absolutely love my version of this table.
The main difference between my table and the Plow and Hearth version is mine doesn’t have cutouts on the sides of each shelf.
My table cost around $30 to make, a $200 savings!
This table will make a great end table.
Instead of having books and magazines piled around my sofa, they can neatly be stored under the table.
How did I make this table?
I could not have made this table without the help of my husband. He loves a challenge and loves to woodwork, so luckily I didn’t have to ask twice for his assistance.
Supplies
- 20” x 72” x 3/4” Spruce Edge Glued Panel – Purchased at Lowe’s
- 2 – 1″ x 3″ x 6′ boards
Building the Table
We started by figuring out the top and shelf sizes and cutting those pieces using the large wood panel.
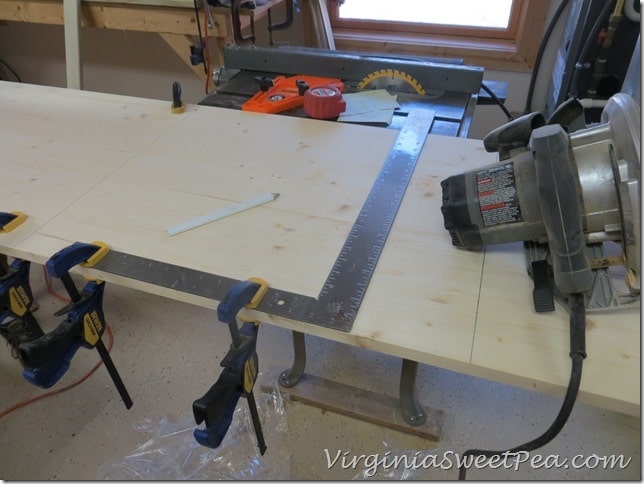
We next made the two shelves for the table.
A 15-degree angle gave us the chevron look for the two bottom shelves. We used duck tape to tape the two boards together before applying glue.
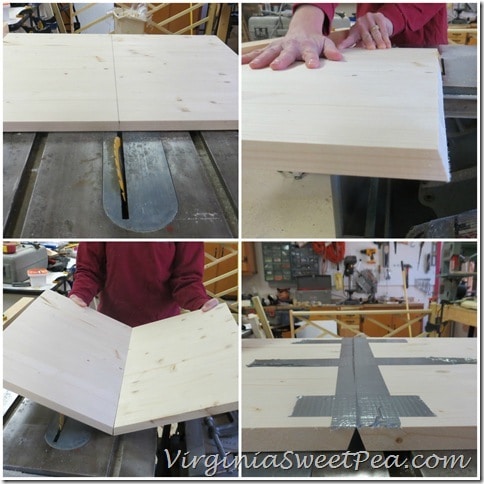
Glue was applied and both shelves were set aside to dry.
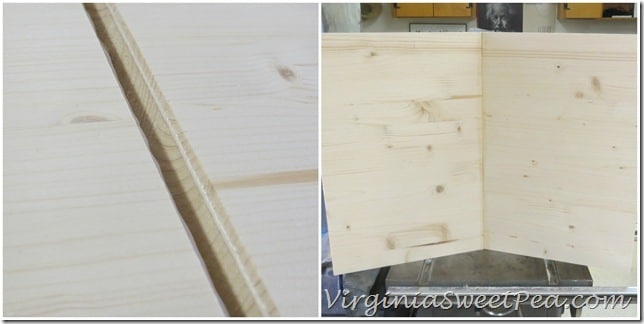
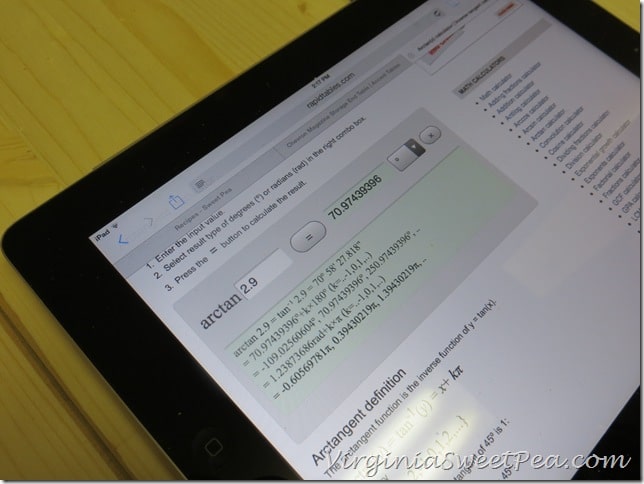
We next designed the legs of the table and used the 1×3’s to build them. The math involved made my head spin a bit!
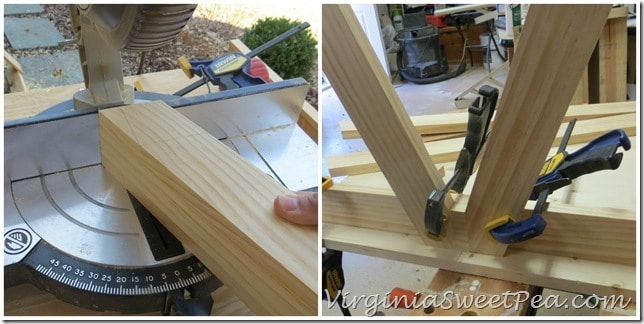
Mr. SP did the thinking and I did the cutting after he marked the boards for me. You can see below that his math was perfect as the pieces fit together like a glove.
Our next step was to use the table saw to taper the table legs.
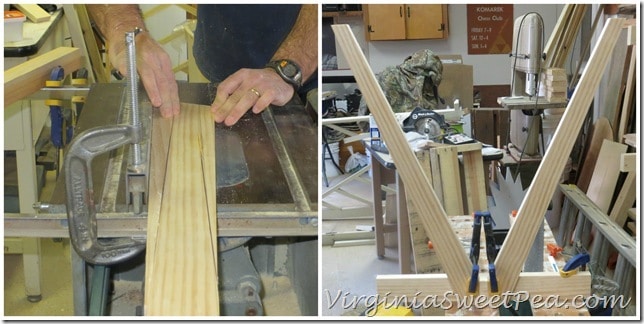
The pieces to which the legs attach were designed and cut out next.
After we were sure that everything was perfect, we glued the pieces together and clamped everything in place. After the glue dried, the legs were sanded.
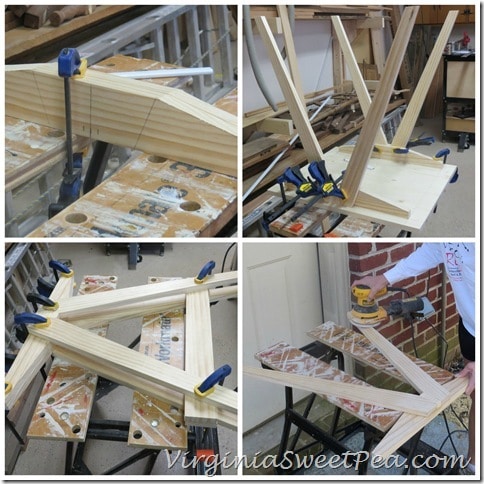
We next attached the two shelves with screws. At this point the legs are not yet connected to the table top.
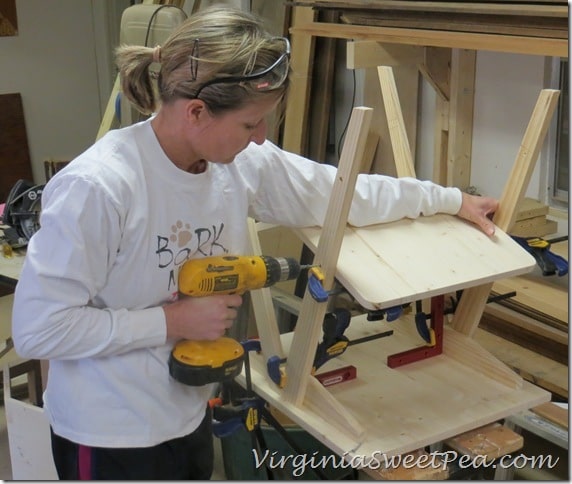
Both shelves are now screwed in place.
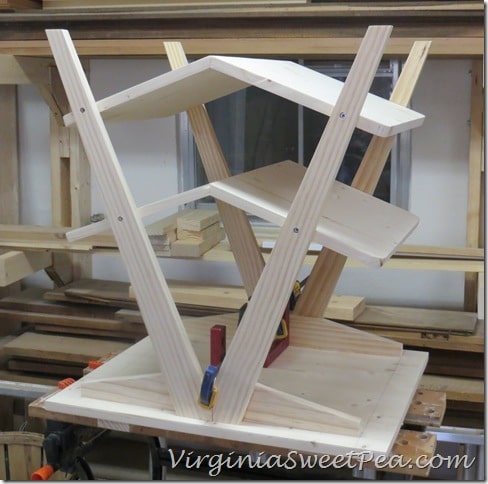
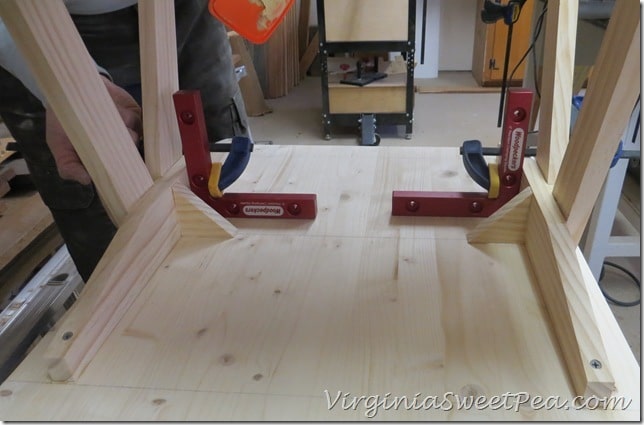
We then glued and screwed the legs to the table top. We chose to add small braces to each leg for added support.
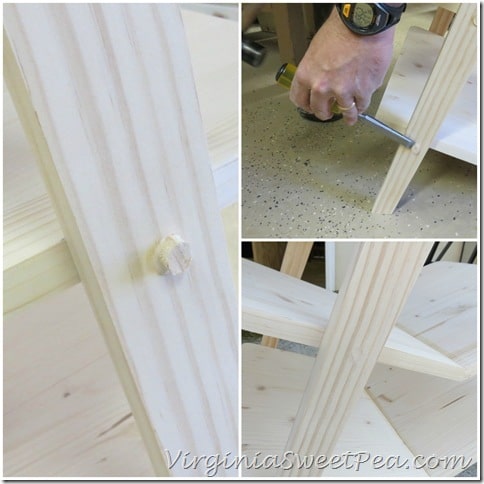
Our next step was to make wood plugs to hide the eight screws on the table legs.
The plugs were inserted into each hole with a bit of glue added. After the glue dried, Mr. SP chiseled off most of the wood and I sanded each leg smooth.
We built our table with stain grade wood, so I could have chosen to stain it, but instead I used paint leftover from my trash to treasure dresser makeover, Valspar Churchill Hotel Brown from Lowes.
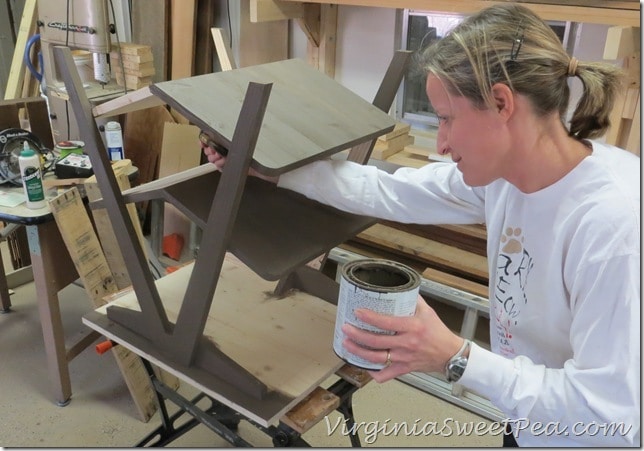
I applied three coats of paint and lightly sanded between coats. This project took three weekend afternoons and was so much fun.
I love to get in the workshop with Mr. SP! He’s a great teacher and I enjoy learning how to use his power tools. I’m so pleased with our side table with storage for books and magazines.!


I just have to say that I like your table the best! You and your husband are very talented and I love your bunny display on the table top. Also, I think you should make more and sell them to people that can’t build tables (like me)! 🙂 I’m pinning!
I would love to be able to make more to sell, it’s the time thing that’s the problem!
Paula,
You sure did rock it!!! Plow and Hearth is a favorite catalog of mine. Your table is perfect!!! Quite impressed with y’all skills! ~Christy
I like the Plow and Hearth catalog, too. There’s a store in Charlottesville that’s fun to visit when we travel that way. My husband was the mastermind of this project, so be impressed with him, not me. I’m lucky that he’s so willing to help me learn my way around the workshop.
That is an awesome table Paula!! I love good math!! (I just hate to be the one to have to figure it out!! 😉 )
Great job!
Nancy
I probably would still be down in the basement figuring if the math had been up to me!
Um. Amazing! I am so impressed! Your version looks perfect. 🙂
Thanks, Christy!
Wow, you did a great job! Looks like a lot of hard work and it really paid off! It looks amazing.
Thanks, Jen! We had fun making it together.
Paula, I love your version better and agree it looks better without the cutouts. Definitely love the price! Great job.
~Tami
Thanks, Tami! If we factored in our time, the $199 Plow and Hearth table might seem like a bargain!
You and Mr. SP knocked it out of the park! Yours is even more aweome than the H&P version! Love how y’all work with the power tools together! That’s quite the Hack!
Thanks, Therese! We both are really pleased with this project.
Great knockoff!!! And I love your woodworking skills. I do like your table more and it’s great that you made it yourselves together! <3 ~Jeanette
I’m slowly but surely learning woodworking skills, Jeanette. My husband still keeps a close eye on me, just in case!
Very impressed with your woodworking prowess! Great table.
Thanks, Alison! My husband and I have a lot of fun doing projects together.
Wow! I have never seen this table design but I LOVE it. Great place to put magazines. You did an amazing job. It must be nice to have your hands on all that power stuff. Great job!
Wow…love the table and you did a fabulous tutorial. I can’t believe what some stores want to charge for an simple end table and you proved how much profit they actually make…great job!
Oh my gosh, Paula! This piece is incredible! You did such a great job!! I’m curious about the picture with your iPad. Is that a planning app or website that you use? I want to get into woodworking and building things but I find it quite intimidating! Any tips would be appreciated. Once again, I love the table!
Paula, you and your husband work great together!! This is a great knockoff…but really I hate to call it that, it’s perfect! ~Sonya
I really, really love this Paula! I’m going to send the link to my husband. Maybe he will make me some. You did such a nice job. I will pin it for the future too. We could use this at our future Alaska cabin or house on some warm beach. A girl can dream, right?
Paula, wow, this is fantastic! You ladies are definitely rocking these knock-offs and this is just amazing! Thanks so much for sharing and of course, pinning! 🙂 Have a fabulous day!
Wow Paula I like your version better than the “original”. Great job my friend! ~Beth
Okay!…So glad to find your blog. I love it!! This table is so cute–y’all are some talented folks! Love knock-offs!
Love this! Thanks for sharing
WOW! WOW! WOW! You really should think about opening up your own shop! Nice job 🙂
Fantastic! Good choice of table to knock off, too.
Oh Paula! Your table is so impressive. From the style, to the construction, to the color. Thanks for sharing! I am happily pinning 🙂
Make it a great day!
Paula! I’m so incredibly impressed that you BUILT that! Amazing! I love the chevron shelving– how perfect for reading material! Great job, girl!
~Abby =)
This is amazing! You and Sweetpea make a super team, and your table is perfect looking.
You need to sell them!
Hi, I found your post through the Best of the Weekend link party. This table looks so good, I can’t believe you made it, I wish I was that handy.
Pinning!!!!
Wow this is fantastic! You did a incredible job! Love everything about it!
Hi Paula, thanks for linking your awesome table at the DIY Sunday Showcase party! I love this table and added it to the DIY Sunday Showcase Board on Pinterest.
Thanks so much, Marie!
This is awesome! I’m speechless ~ so cool.
Thank you for sharing this at DIY Showcase on VMG206.
~ Megin of VMG206
Thank you, Megin! We had a lot of fun building it.
Loving your table, very well done, love the tutorial. Will be helpful to my hubs when we make this table. He has a hard time (due to a stroke) getting angles, things like that now. He can make pretty much anything but after his stroke some things are harder for him. He lost 2 big sections of brain cells when he had his stroke (Oct.2010) but considering he does pretty darned well. I like to find projects for him to do to keep his mind and hands busy, he needs that and I get great things I want.
Your hubs is quite a woodworker, he does things the right way, not jerry rigged. He deserves a big compliment for his artistry and workmanship, you too. Thanks for a specific and well done tutorial my hubs will be able to do this. I love tables and especially different style ones. Look forward to getting started on this. We have to wait til it’s better weather as we don’t have a basement or garage to work in. Sure glad you shared this table. Have saved and pinned this project. Happy Spring days
This was such a big hit on our rock your knockoff tour and I still love it! SO glad to see it at our party! XO
Thanks, Christy! I’ve since added a border of gold around the top of it and I love the added detail.
Paula
What are the angles and lengths for the legs? And how long are the shelves? I love the design!
Virginia Sweet Pea you really knocked it out of the park! Hugs!